6.828Lab3

LAB3: User Environments

实验三中,you will implement the basic kernel facilities required to get a protected user-mode environment (i.e., “process”) running. 将实现运行受保护的用户模式环境(即进程)所需的基本内核功能。将增强JOS内核以设置数据结构来跟踪 用户环境、创建单个用户环境、将程序映像(program image)加载到其中并开始运行。还需要使得JOS内核能够处理用户环境进行的任何调用和解决它所造成的一切异常情况。

killall XXX杀掉所有的进程 kill xxx(PID)杀死进程号xxx的进程,查看所有运行进程的命令:ps -aux

Part A: User Environment and Expection Handling

image-20220629161158698

inc/env.h 查看最大进程个数NENV为1024

kern/env.c 全局变量

1
2
3
4
5
6
7
// env指针指向一个由Env结构体组成的数组,同时,不活动的Env记录在env_free_list 中, 和之前的page_free_list很像
struct Env *envs = NULL; // All environments
struct Env *curenv = NULL; // The current env curenv记录着现在正在运行的进程,在第一个进程运行之前为空
static struct Env *env_free_list; // Free environment list
// (linked by Env->env_link)

#define ENVGENSHIFT 12 // >= LOGNENV

inc/enc.h 中查看Env结构体的具体信息

1
2
3
4
5
6
7
8
9
10
11
12
struct Env {
struct Trapframe env_tf; // Saved registers
struct Env *env_link; // Next free Env
envid_t env_id; // Unique environment identifier
envid_t env_parent_id; // env_id of this env's parent
enum EnvType env_type; // Indicates special system environments
unsigned env_status; // Status of the environment
uint32_t env_runs; // Number of times environment has run

// Address space
pde_t *env_pgdir; // Kernel virtual address of page dir
};

env_id 进程的身份标识。

env_status 进程的运行状态。

env_link 类似于PageInfo中的pp_link,用于创建空闲进程链表,若进程槽已分配,则置为NULL。

env_tf 是一个Trapframe型的结构体(Trapframe是指中断、自陷、异常进入内核后,在堆栈上形成的一种数据结构),用于登记进程运行时的寄存器信息。

env_pgdir 指向进程运行所用的页目录,即描述了进程的用户地址空间。

在JOS中,进程的运行实体是线程,而env_tf描述的实际上是所说的之行线程。文档中说明:当进程不在运行状态时,env_tf保存了进程的寄存器信息,内核在硬件控制权由用户转到内核时保存这些信息,使得进程可以在之后恢复到它交出控制权时的状态。

Exercise 1: Allocating the Environments Array

修改 kern/pmap.c 中的 mem_init() 来分配和映射 envs 数组。这个数组完全由 ENEV(1024) 个结构体Env组成,与分配 pages 数组的方式非常相似。同时像 pages 数组一样, 在UENVS(定义在inc/memlayout.h)上的用户,内存也该被映射为只读,这样用户进程就可以从这个数组中读取数据。

You should run your code and make sure check_kern_pgdir() succeeds.

1
2
3
4
5
6
7
8
9
10
11
12
13
14
15
16
17
18
19
20
21
22
23
24
25
26
27
28
29
30
31
32
33
34
35
36
37
38
39
40
41
42
43
44
45
46
47
48
49
50
51
52
53
54
55
56
57
58
59
60
61
62
63
64
65
66
67
68
69
70
71
72
73
74
75
76
77
78
79
80
81
82
83
84
85
86
87
88
89
90
91
92
93
94
95
96
97
98
99
100
101
102
103
104
105
106
107
108
109
110
111
112
113
114
115
116
117
118
119
120
121
122
123
124
125
126
127
128
129
130
131
132
133
134
135
136
137
138
139
140
141
142
143
144
145
146
147
148
149
150
151
152
153
154
155
156
157
158
159
160
161
162
163
164
165
166
167
168
169
170
171
172
173
174
175
176
177
178
179
180
181
182
183
184
185
186
187
188
189
190
191
192
193
194
195
196
197
198
199
200
201
202
203
204
205
206
207
208
209
210
211
212
213
214
215
216
217
218
219
220
221
222
223
224
225
226
227
228
229
230
231
232
233
234
235
236
237
238
239
240
void
mem_init(void)
{
uint32_t cr0;
size_t n;

// Find out how much memory the machine has (npages & npages_basemem).
i386_detect_memory();

// Remove this line when you're ready to test this function.
//panic("mem_init: This function is not finished\n");

//////////////////////////////////////////////////////////////////////
// create initial page directory.
kern_pgdir = (pde_t *) boot_alloc(PGSIZE);
memset(kern_pgdir, 0, PGSIZE);

//////////////////////////////////////////////////////////////////////
// Recursively insert PD in itself as a page table, to form
// a virtual page table at virtual address UVPT.
// (For now, you don't have understand the greater purpose of the
// following line.)

// Permissions: kernel R, user R
kern_pgdir[PDX(UVPT)] = PADDR(kern_pgdir) | PTE_U | PTE_P;

//////////////////////////////////////////////////////////////////////
// Allocate an array of npages 'struct PageInfo's and store it in 'pages'.
// The kernel uses this array to keep track of physical pages: for
// each physical page, there is a corresponding struct PageInfo in this
// array. 'npages' is the number of physical pages in memory. Use memset
// to initialize all fields of each struct PageInfo to 0.
// Your code goes here:


//////////////////////////////////////////////////////////////////////
// Make 'envs' point to an array of size 'NENV' of 'struct Env'.
// LAB 3: Your code here.

//////////////////////////////////////////////////////////////////////
// Now that we've allocated the initial kernel data structures, we set
// up the list of free physical pages. Once we've done so, all further
// memory management will go through the page_* functions. In
// particular, we can now map memory using boot_map_region
// or page_insert
page_init();

check_page_free_list(1);
check_page_alloc();
check_page();

//////////////////////////////////////////////////////////////////////
// Now we set up virtual memory

//////////////////////////////////////////////////////////////////////
// Map 'pages' read-only by the user at linear address UPAGES
// Permissions:
// - the new image at UPAGES -- kernel R, user R
// (ie. perm = PTE_U | PTE_P)
// - pages itself -- kernel RW, user NONE
// Your code goes here:

//////////////////////////////////////////////////////////////////////
// Map the 'envs' array read-only by the user at linear address UENVS
// (ie. perm = PTE_U | PTE_P).
// Permissions:
// - the new image at UENVS -- kernel R, user R
// - envs itself -- kernel RW, user NONE
// LAB 3: Your code here.

//////////////////////////////////////////////////////////////////////
// Use the physical memory that 'bootstack' refers to as the kernel
// stack. The kernel stack grows down from virtual address KSTACKTOP.
// We consider the entire range from [KSTACKTOP-PTSIZE, KSTACKTOP)
// to be the kernel stack, but break this into two pieces:
// * [KSTACKTOP-KSTKSIZE, KSTACKTOP) -- backed by physical memory
// * [KSTACKTOP-PTSIZE, KSTACKTOP-KSTKSIZE) -- not backed; so if
// the kernel overflows its stack, it will fault rather than
// overwrite memory. Known as a "guard page".
// Permissions: kernel RW, user NONE
// Your code goes here:

//////////////////////////////////////////////////////////////////////
// Map all of physical memory at KERNBASE.
// Ie. the VA range [KERNBASE, 2^32) should map to
// the PA range [0, 2^32 - KERNBASE)
// We might not have 2^32 - KERNBASE bytes of physical memory, but
// we just set up the mapping anyway.
// Permissions: kernel RW, user NONE
// Your code goes here:

// Check that the initial page directory has been set up correctly.
check_kern_pgdir();

// Switch from the minimal entry page directory to the full kern_pgdir
// page table we just created. Our instruction pointer should be
// somewhere between KERNBASE and KERNBASE+4MB right now, which is
// mapped the same way by both page tables.
//
// If the machine reboots at this point, you've probably set up your
// kern_pgdir wrong.
lcr3(PADDR(kern_pgdir));

check_page_free_list(0);

// entry.S set the really important flags in cr0 (including enabling
// paging). Here we configure the rest of the flags that we care about.
cr0 = rcr0();
cr0 |= CR0_PE|CR0_PG|CR0_AM|CR0_WP|CR0_NE|CR0_MP;
cr0 &= ~(CR0_TS|CR0_EM);
lcr0(cr0);

// Some more checks, only possible after kern_pgdir is installed.
check_page_installed_pgdir();

// Find out how much memory the machine has (npages & npages_basemem).
i386_detect_memory();

// Remove this line when you're ready to test this function.
// panic("mem_init: This function is not finished\n");

//////////////////////////////////////////////////////////////////////
// create initial page directory.
kern_pgdir = (pde_t *) boot_alloc(PGSIZE);
memset(kern_pgdir, 0, PGSIZE);

//////////////////////////////////////////////////////////////////////
// Recursively insert PD in itself as a page table, to form
// a virtual page table at virtual address UVPT.
// (For now, you don't have understand the greater purpose of the
// following line.)

// Permissions: kernel R, user R
kern_pgdir[PDX(UVPT)] = PADDR(kern_pgdir) | PTE_U | PTE_P;

//////////////////////////////////////////////////////////////////////
// Allocate an array of npages 'struct PageInfo's and store it in 'pages'.
// The kernel uses this array to keep track of physical pages: for
// each physical page, there is a corresponding struct PageInfo in this
// array. 'npages' is the number of physical pages in memory. Use memset
// to initialize all fields of each struct PageInfo to 0.
// Your code goes here:
// 创建一个struct PageInfo 的数组
// kernel 使用这个数组来耿总每个物理页
// 对于每一个物理页,都会有一个对应的 struct PageInfo 在数组中
pages = (struct PageInfo *) boot_alloc(npages * sizeof(struct PageInfo));
// npages 是内存中物理页的数量
memset(pages, 0, npages * sizeof(struct PageInfo));

//////////////////////////////////////////////////////////////////////
// Now that we've allocated the initial kernel data structures, we set
// up the list of free physical pages. Once we've done so, all further
// memory management will go through the page_* functions. In
// particular, we can now map memory using boot_map_region
// or page_insert
page_init();

check_page_free_list(1);
check_page_alloc();
check_page();

//////////////////////////////////////////////////////////////////////
// Now we set up virtual memory

//////////////////////////////////////////////////////////////////////
// Map 'pages' read-only by the user at linear address UPAGES
// Permissions:
// - the new image at UPAGES -- kernel R, user R
// (ie. perm = PTE_U | PTE_P)
// - pages itself -- kernel RW, user NONE
// Your code goes here:
// UPAGES是JOS记录物理页面使用情况的数据结构,只有kernel能够访问
// 为了使用户空间能访问这块数据结构,会将PAGES映射到UPAGES的位置
// 但是现在需要让用户空间能够读取这段线性地址,因此需要建立映射,将用户空间的一块内存映射到存储该数据结构的物理地址上
// boot_map_region() 建立映射关系
boot_map_region(kern_pgdir, (uintptr_t)UPAGES, npages*sizeof(struct PageInfo), PADDR(pages), PTE_U | PTE_P);
// 目前建立了一个页目录,kernel_pgdir
// pgdir为页目录指针, UPAGES为虚拟地址,npages*sizeof(struct* PageInfo)为映射的内存块大小
// PADDR(pages) 为物理地址, PTE_U | PTE为权限 (PTE_U 表示用户可读)


//////////////////////////////////////////////////////////////////////
// Use the physical memory that 'bootstack' refers to as the kernel
// stack. The kernel stack grows down from virtual address KSTACKTOP.
// We consider the entire range from [KSTACKTOP-PTSIZE, KSTACKTOP)
// to be the kernel stack, but break this into two pieces:
// * [KSTACKTOP-KSTKSIZE, KSTACKTOP) -- backed by physical memory
// * [KSTACKTOP-PTSIZE, KSTACKTOP-KSTKSIZE) -- not backed; so if
// the kernel overflows its stack, it will fault rather than
// overwrite memory. Known as a "guard page".
// Permissions: kernel RW, user NONE
// Your code goes here:
// kernel 内核栈
// kernel stack 从虚拟地址 KSTACKTOP 开始,向低地址增长,所以KSTACKTOP实际上是栈顶
// KSTACKTOP = 0xf0000000,
// KSTKSIZE = (8*PGSIZE) = 8*4096(bytes) = 32KB
// 只需要映射 [KSTACKTOP, KSTACKTOP - KSTKSIZE) 范围的虚拟地址
boot_map_region(kern_pgdir, (uintptr_t)(KSTACKTOP - KSTKSIZE), KSTKSIZE, PADDR(bootstack), PTE_W | PTE_P);
// PTE_W 开启了写权限,但是并未打开 PTE_U, 因此用户没有权限,只有内核有权限


//////////////////////////////////////////////////////////////////////
// Map all of physical memory at KERNBASE.
// Ie. the VA range [KERNBASE, 2^32) should map to
// the PA range [0, 2^32 - KERNBASE)
// We might not have 2^32 - KERNBASE bytes of physical memory, but
// we just set up the mapping anyway.
// Permissions: kernel RW, user NONE
// Your code goes here:
// 内核部分
// KERNBASE = 0xF0000000, VA大小为 2^32 - KERNBASE
// ROUNDUP(a,n) 将a四舍五入到最接近n的倍数
boot_map_region(kern_pgdir, (uintptr_t)KERNBASE, ROUNDUP(0xffffffff - KERNBASE + 1, PGSIZE), 0, PTE_W | PTE_P);

// Check that the initial page directory has been set up correctly.
check_kern_pgdir();

// Switch from the minimal entry page directory to the full kern_pgdir
// page table we just created. Our instruction pointer should be
// somewhere between KERNBASE and KERNBASE+4MB right now, which is
// mapped the same way by both page tables.
//
// If the machine reboots at this point, you've probably set up your
// kern_pgdir wrong.
lcr3(PADDR(kern_pgdir));

check_page_free_list(0);

// entry.S set the really important flags in cr0 (including enabling
// paging). Here we configure the rest of the flags that we care about.
cr0 = rcr0();
cr0 |= CR0_PE | CR0_PG | CR0_AM | CR0_WP | CR0_NE | CR0_MP;
cr0 &= ~(CR0_TS | CR0_EM);
lcr0(cr0);

// Some more checks, only possible after kern_pgdir is installed.
check_page_installed_pgdir();


}

Exercise 2: Creating and Running Environments

You will now write the code in kern/env.c necessary to run a user environment. Because we do not yet have a filesystem, we will set up the kernel to load a static binary image that is embedded within the kernel itself. JOS embeds this binary in the kernel as a ELF executable image.

In i386_init() in kern/init.c you’ll see code to run one of these binary images in an environment. However, the critical functions to set up user environments are not complete; you will need to fill them in.

在kern/env.c中,补充完成以下函数

env_init()

​ 初始化 envs 数组中所有的结构体 Env,并把它们添加到env_free_list。

​ 调用 env_init_percpu,它为 privilege level 0(kernel) 和 privilege level 3(user) 配置特定的段。

env_steup_vm()

​ 为新环境分配一个页目录,并且初始化新环境地址空间的内核部分。

region_alloc()

​ 为环境分配和映射物理内存。

load_icode()

​ 您需要解析ELF二进制映像,就像引导加载程序已经做的那样,并将其内容加载到新环境的用户地址空间中。

env_create()

​ 使用env_alloc分配一个环境,并调用load_icode将ELF二进制文件加载到其中。

env_run()

​ 启动以用户模式运行的给定环境。

As you write these functions, you might find the new cprintf verb %e useful – it prints a description corresponding to an error code. For example,

1
2
r = -E_NO_MEM;
panic("env_alloc: %e", r);

will panic with the message “env_alloc: out of memory”.

Below is a call graph of the code up to the point where the user code is invoked. Make sure you understand the purpose of each step.

  • start (kern/entry.S)
  • i386_init (kern/init.c)
    • cons_init
    • mem_initenv_init
    • trap_init (still incomplete at this point)
    • env_create
    • env_run
      • env_pop_tf

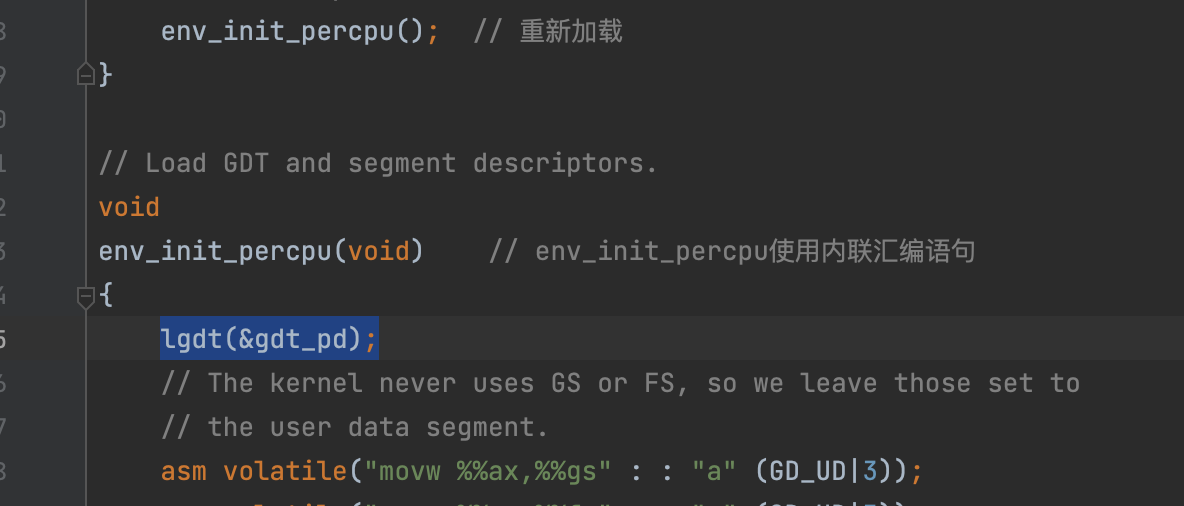
boot.S中通过ljmp跳转指令使cs的索引值指向代码段描述符,并将选择子ds、es、fs、gs和ss的索引值均设置为指向数据段描述符,至此这些段选择子均不曾被更改过。现在我们要创建进程,而原先的GDT中并没有特权级为3的数据段和代码段描述符,所以我们必须加载一个新的GDT。env_init_percpu重新加载了GDT,并设置了各个段选择子。

1
2
3
4
5
6
7
8
9
10
11
12
13
14
15
16
17
18
19
20
21
22
23
24
truct Segdesc gdt[] =
{
// 0x0 - unused (always faults -- for trapping NULL far pointers)
SEG_NULL,

// 0x8 - kernel code segment
[GD_KT >> 3] = SEG(STA_X | STA_R, 0x0, 0xffffffff, 0),

// 0x10 - kernel data segment
[GD_KD >> 3] = SEG(STA_W, 0x0, 0xffffffff, 0),

// 0x18 - user code segment
[GD_UT >> 3] = SEG(STA_X | STA_R, 0x0, 0xffffffff, 3),

// 0x20 - user data segment
[GD_UD >> 3] = SEG(STA_W, 0x0, 0xffffffff, 3),

// 0x28 - tss, initialized in trap_init_percpu()
[GD_TSS0 >> 3] = SEG_NULL
};

struct Pseudodesc gdt_pd = {
sizeof(gdt) - 1, (unsigned long) gdt
};

image-20220701172502082

env_init()

1
2
3
4
5
6
7
8
9
10
11
12
// Set up envs array
// LAB 3: Your code here.
// 初始化 envs 数组中所有的结构体 Env,添加到env_free_list
int i = NENV;
while(i>0){
i--;
envs[i].env_id = 0;
envs[i].env_link = env_free_list;
env_free_list = &envs[i];
}
// Per-CPU part of the initialization
env_init_percpu(); // 重新加载

env_steup_vm()

为新环境分配一个页目录,并且初始化新环境地址空间的内核部分。

1
2
3
4
5
6
7
8
9
10
11
12
13
14
15
16
17
18
19
20
21
22
23
24
25
26
27
28
29
30
31
32
33
34
35
36
37
38
39
static int
env_setup_vm(struct Env *e)
{
int i;
struct PageInfo *p = NULL;

// Allocate a page for the page directory
if (!(p = page_alloc(ALLOC_ZERO))) // 给p分配个 页目录
return -E_NO_MEM;

// Now, set e->env_pgdir and initialize the page directory.
//
// Hint:
// - The VA space of all envs is identical above UTOP
// (except at UVPT, which we've set below).
// See inc/memlayout.h for permissions and layout.
// Can you use kern_pgdir as a template? Hint: Yes.
// (Make sure you got the permissions right in Lab 2.)
// - The initial VA below UTOP is empty.
// - You do not need to make any more calls to page_alloc.
// - Note: In general, pp_ref is not maintained for
// physical pages mapped only above UTOP, but env_pgdir
// is an exception -- you need to increment env_pgdir's
// pp_ref for env_free to work correctly.
// - The functions in kern/pmap.h are handy.
// LAB 3: Your code here.
// env_setup_vm负责创建进程自己的页目录,并初始化内核地址空间。
// 它不需要为内核地址空间另外创建页表,只要先将内核页目录kern_pgdir的所有目录项复制过来即可,以后再设置用户地址空间。
// // pde_t *env_pgdir; // Kernel virtual address of page dir
e->env_pgdir = page2kva(p);
memcpy(e->env_pgdir, kern_pgdir, PGSIZE);
p->pp_ref++; // p此时指向了页目录

// UVPT maps the env's own page table read-only.
// Permissions: kernel R, user R
e->env_pgdir[PDX(UVPT)] = PADDR(e->env_pgdir) | PTE_P | PTE_U;
// PDX() page directory index NPDENTRIES 1024
return 0;
}

region_alloc()

为环境env分配 len 字节的物理内存,并将其映射到环境地址空间中的虚拟地址va。不以任何方式将映射页归零或初始化。页面应该是用户和内核可写的。Panic if any allocation attempt fails.

region_alloc为一个进程分配指定长度的内存空间,并按指定的起始线性地址映射到分配的物理内存上。该函数只在加载用户程序到内存中时(目前通过load_icode)才被用到,分配用户栈的工作将交给load_icode完成。我们会用到lab2中实现的page_alloc和page_insert分别完成物理页的分配与映射。我们不需要对被分配的物理页进行初始化,物理页的权限将被设置为内核和用户都可读写,va和va+len需要设置为页对齐(corner-case应该是当分配的地址超过UTOP时,这里直接panic)。

1
2
3
4
5
6
7
8
9
10
11
12
13
14
15
16
17
18
19
20
21
22
static void
region_alloc(struct Env *e, void *va, size_t len)
{
// LAB 3: Your code here.
// (But only if you need it for load_icode.)
//
// Hint: It is easier to use region_alloc if the caller can pass
// 'va' and 'len' values that are not page-aligned.
// You should round va down, and round (va + len) up.
// (Watch out for corner-cases!)
uintptr_t va_start = ROUNDDOWN((uintptr_t)va, PGSIZE);
uintptr_t va_end = ROUNDUP((uintptr_t)va + len, PGSIZE);
struct PageInfo *pginfo = NULL;
for(int cur_va = va_start;cur_va<va_end;cur_va+=PGSIZE){
pginfo = page_alloc(0);
if(!pginfo){
panic("region_alloc: pageinfo failed.");
}
cprintf("insert page at %08x\n.", cur_va);
page_insert(e->env_pgdir, pginfo, (void*)cur_va, PTE_U | PTE_W | PTE_P);
}
}

load_icode()

由于我们还没有实现文件系统,甚至连磁盘都没有,所以当然不可能从磁盘上加载一个用户程序到内存中。因此,我们暂时将ELF可执行文件嵌入内核,并从内存中加载这样的ELF文件,以此模拟从磁盘加载用户程序的过程。lab3 GNUmakefile负责设置将这样的ELF可执行文件直接嵌入内核

Hint:

在ELF段头指定的地址处把每个程序段加载到虚拟内存中。

你应该只加载 ph->p_type == ELF_PROG_LOAD 的段。

每个段的虚拟地址可以使用 ph->p_va 得到,同时它在内存中的大小可通过ph->memsz得到。

The ph->p_filesz bytes from the ELF binary, starting at binary + ph->p_offset, should be copied to virtual address ph->p_va.

ELF头应该有 ph->p_filesz <= ph->p_memsz.

所有的页面是用户可读/写的。

ELF段不一定是页面对齐的,但是你可以假设这个函数中没有两个段会接触同一个虚拟页面。

您还必须对程序的入口点做一些操作,以确保环境从那里开始执行。

怎么切换页目录?
lcr3([页目录物理地址]) 将地址加载到 cr3 寄存器。

怎么更改函数入口?
env->env_tf.tf_eip 设置为 elf->e_entry,等待之后的 env_pop_tf() 调用。

1
2
3
4
5
6
7
8
9
10
11
12
13
14
15
16
17
18
19
20
21
22
23
24
25
26
27
28
29
30
31
32
33
34
35
36
37
38
39
40
41
42
43
44
45
46
47
48
49
50
51
52
53
54
55
56
57
58
59
60
61
62
static void
load_icode(struct Env *e, uint8_t *binary)
{
// Hints:
// Load each program segment into virtual memory
// at the address specified in the ELF segment header.
// You should only load segments with ph->p_type == ELF_PROG_LOAD.
// Each segment's virtual address can be found in ph->p_va
// and its size in memory can be found in ph->p_memsz.
// The ph->p_filesz bytes from the ELF binary, starting at
// 'binary + ph->p_offset', should be copied to virtual address
// ph->p_va. Any remaining memory bytes should be cleared to zero.
// (The ELF header should have ph->p_filesz <= ph->p_memsz.)
// Use functions from the previous lab to allocate and map pages.
//
// All page protection bits should be user read/write for now.
// ELF segments are not necessarily page-aligned, but you can
// assume for this function that no two segments will touch
// the same virtual page.
//
// You may find a function like region_alloc useful.
//
// Loading the segments is much simpler if you can move data
// directly into the virtual addresses stored in the ELF binary.
// So which page directory should be in force during
// this function?
//
// You must also do something with the program's entry point,
// to make sure that the environment starts executing there.
// What? (See env_run() and env_pop_tf() below.)

// LAB 3: Your code here.
struct Elf *elf_hdr = (struct Elf *)binary; // ELF头// 准备对二进制ELF文件进行操作
struct Proghdr *ph, *eph; // 程序头

if(elf_hdr->e_magic != ELF_MAGIC){
panic("load_icode: invalid ELF binary.");
}
ph = (struct Proghdr*)(binary + elf_hdr->e_phoff); // 加上偏移量
eph = ph+elf_hdr->e_phnum;

// 切换页目录
lcr3(PADDR(e->env_pgdir)); // lcr3() to switch to its address space.

for(;ph<eph;ph++){
if(ph->p_type == ELF_PROG_LOAD){ // 满足ELF的条件
if (ph->p_filesz > ph->p_memsz) {
panic("load_icode: file size is greater than memory size");
}
region_alloc(e, (void*)ph->p_va, ph->p_memsz);
memcpy((void*)ph->p_va, binary+ph->p_offset, ph->p_filesz); // 拷贝文件内容
memset((void*)ph->p_va + ph->p_filesz, 0, ph->p_memsz - ph->p_filesz);
}
}
e->env_tf.tf_eip = elf_hdr->e_entry; // 切换入口
// Now map one page for the program's initial stack
// at virtual address USTACKTOP - PGSIZE.
// 现在映射一个页面为程序的初始堆栈在虚拟地址USTACKTOP - PGSIZE.
// LAB 3: Your code here.
region_alloc(e,(void*)USTACKTOP - PGSIZE, PGSIZE);
lcr3(PADDR(kern_pgdir));
}

env_create()
作用是新建一个进程。调用已经写好的 env_alloc() 函数即可,之后更改类型并且利用 load_icode() 读取 ELF。

这里的进程即环境.

1
2
3
4
5
6
7
8
9
10
11
12
13
14
15
// 作用是新建一个进程。
// 调用已经写好的 env_alloc() 函数即可,之后更改类型并且利用 load_icode() 读取 ELF。
void
env_create(uint8_t *binary, enum EnvType type)
{
// LAB 3: Your code here.
struct Env* e; // 新建一个进程
int r = env_alloc(&e, 0);
if(r<0){
panic("env_create: env alloc error.\n");
}
// 分配成功
e->env_type = ENV_TYPE_USER;
load_icode(e, binary);
}

env_run()

​ 启动以用户模式运行的给定环境。

//步骤1:如果这是一个上下文切换(一个新的环境正在运行):

/ / 1。设置当前环境(如果有的话)回ENV_RUNNABLE如果它是ENV_RUNNING(想想它可以处于什么其他状态),

/ / 2。将’curenv’设置为新环境,

/ / 3。设置它的状态为ENV_RUNNING,更新env_status

/ / 4。更新它的’env_runs’计数器,

/ / 5。使用lcr3()切换到它的地址空间。

//步骤2:使用env_pop_tf()恢复环境的寄存器,并在环境中进入用户模式。

//Hint: 这个函数从e->env_tf加载新环境的状态。返回前面编写的代码,确保将e->env_tf的相关部分设置为合理的值。

1
2
3
4
5
6
7
8
9
10
11
12
13
14
15
16
17
18
19
20
21
void
env_run(struct Env *e)
{
// Hint: This function loads the new environment's state from
// e->env_tf. Go back through the code you wrote above
// and make sure you have set the relevant parts of
// e->env_tf to sensible values.

// LAB 3: Your code here.
// struct Env *curenv 记录着当前正在运行的进程
if(curenv && curenv->env_status == ENV_RUNNING){
curenv->env_status = ENV_RUNNABLE;
}
curenv = e;
e->env_status = ENV_RUNNING;
e->env_runs++;
lcr3(PADDR(e->env_pgdir));
env_pop_tf(&e->env_tf);

// panic("env_run not yet implemented");
}

Exercise 3: Handling Interrupts and Exceptions

用户空间中的第一个int $0x30系统调用指令是一个死胡同:一旦处理器进入用户模式,就没有办法返回。现在需要实现基本的异常和系统调用处理,以便内核能够从用户模式代码中恢复对处理器的控制。您应该做的第一件事是彻底熟悉x86中断和异常机制。

Read Chapter 9, Exceptions and Interrupts in the 80386 Programmer’s Manual (or Chapter 5 of the IA-32 Developer’s Manual), if you haven’t already.

根据xv6讲义,一共有三种必须将控制由用户程序转移到内核的情形:系统调用、异常和中断。

系统调用发生在用户程序请求一项操作系统的服务时。

异常发生在用户程序想要执行某种非法的操作时,如除以零或者访问不存在的页表项。

中断发生在某个外部设备需要操作系统的留意时,比如时钟芯片会定时产生一个中断提醒操作系统可以将硬件资源切换给下一个进程使用一会儿了。

在大多数处理器上,这三种情形都是由同一种硬件机制来处理的。对于x86,系统调用和异常本质上也是生成一个中断,因此操作系统只需要提供一套针对中断的处理策略就可以了。

操作系统处理中断时要用到中断描述符表IDT程序状态段TSS

  1. 中断描述符表IDT (interrupt descriptor table)

​ x86最多支持256个不同中断和异常的条目,每个包含一个中断向量,是一个0~255之间的数字,代表中断来源:不同的设备及类型错误。

​ IDT使得系统调用、异常和中断都只能经由被内核定义的入口进入正确的中断处理程序。每一个中断处理程序都对应一个中断向量或中断号,处理器接收中断号后,会以它作为索引值从IDT中找到对应的中断描述符。接着,处理器从描述符中取出定位中断处理程序要用到的 eip(指令指针寄存器)cs(代码段寄存器) 的值。

EIP中的值指向内核中处理这类异常的代码。 Extend Instruction Pointer

CS中的最低两位表示优先级,因此寻址空间少两位 .

在JOS中,所有异常都在内核模式处理,优先级为0(用户模式为3)

  1. 任务状态段 (Task State Segment, TSS)

​ 处理器需要保存中断和异常出现时的自身状态,例如EIP和CS,以便处理完后能返回原函数继续执行。但是存储区域必须禁止用户访问,避免恶意代码或bug的破坏。

​ 因此,当x86处理器处理从用户态到内核态的模式转换时,也会切换到内核栈。而TSS指明段选择器和栈地址,处理器将SS, ESP, EFLAGS, CS, EIP压入新栈,然后从IDT读取EIP和CS,根据新栈设置ESP和SS。

SS是堆栈段寄存器。它指向将用于堆栈的内存的一般区域。

ESP是堆栈指针寄存器。它指向在存储器的“堆栈段”区域内的堆栈“顶部”的任何给定点处的精确位置。

EFLAGS标志寄存器。

JOS仅利用TSS来定义需要切换的内核栈。由于内核模式在JOS优先级是0,因此处理器用TSS的ESP0和SS0来定义内核栈,无需TSS结构体中的其他内容。其中,SS0中存储的是GD_KD

#define GD_KD 0x10 // kernel data

ESP0中存储的是KSTACKTOP

1
2
#define KSTACKTOP   KERNBASE
#define KERNBASE 0xF0000000

在x86体系中,中断向量范围为0-255(vector number),最多表示256个异常或者中断,用一个8位的无符号整数表示,前32个vector为处理器保留用作异常处理。

32-255被指定为用户定义的中断,并且不由处理器保留。这些vector通常分配给外部I/O设备,以便这些设备能够向处理器发送中断。

一个例子

通过一个例子来理解上面的知识。假设处理器正在执行用户环境的代码,遇到了”除0”异常。

  1. 处理器切换到内核栈,利用了上文 TSS 中的 ESP0 和 SS0。

  2. 处理器将异常参数 push 到了内核栈。一般情况下,按顺序 push SS, ESP, EFLAGS, CS, EIP
    +——————–+ KSTACKTOP
    | 0x00000 | old SS | “ - 4
    | old ESP | “ - 8
    | old EFLAGS | “ - 12
    | 0x00000 | old CS | “ - 16
    | old EIP | “ - 20 <—- ESP
    +——————–+
    存储这些寄存器状态的意义是:SS(堆栈选择器) 的低 16 位与 ESP 共同确定当前栈状态;EFLAGS(标志寄存器)存储当前FLAG;CS(代码段寄存器) 和 EIP(指令指针寄存器) 确定了当前即将执行的代码地址,E 代表”扩展”至32位。根据这些信息,就能保证处理中断结束后能够恢复到中断前的状态。

  3. 因为我们将处理一个”除0”异常,其对应中断向量是0,因此,处理器读取 IDT 的条目0,设置 CS:EIP 指向该条目对应的处理函数。

  4. 处理函数获得程序控制权并且处理该异常。例如,终止进程的运行。

image-20220703163747621

ref:https://www.jianshu.com/p/f67034d0c3f2

嵌套的异常和中断

内核和用户进程都会引起异常和中断。然而,仅在从用户环境进入内核时才会切换栈。如果中断发生时已经在内核态了(此时, CS 寄存器的低 2bit 为 00) ,那么 CPU 就直接将状态压入内核栈,不再需要切换栈。这样,内核就能处理内核自身引起的”嵌套异常”,这是实现保护的重要工具。
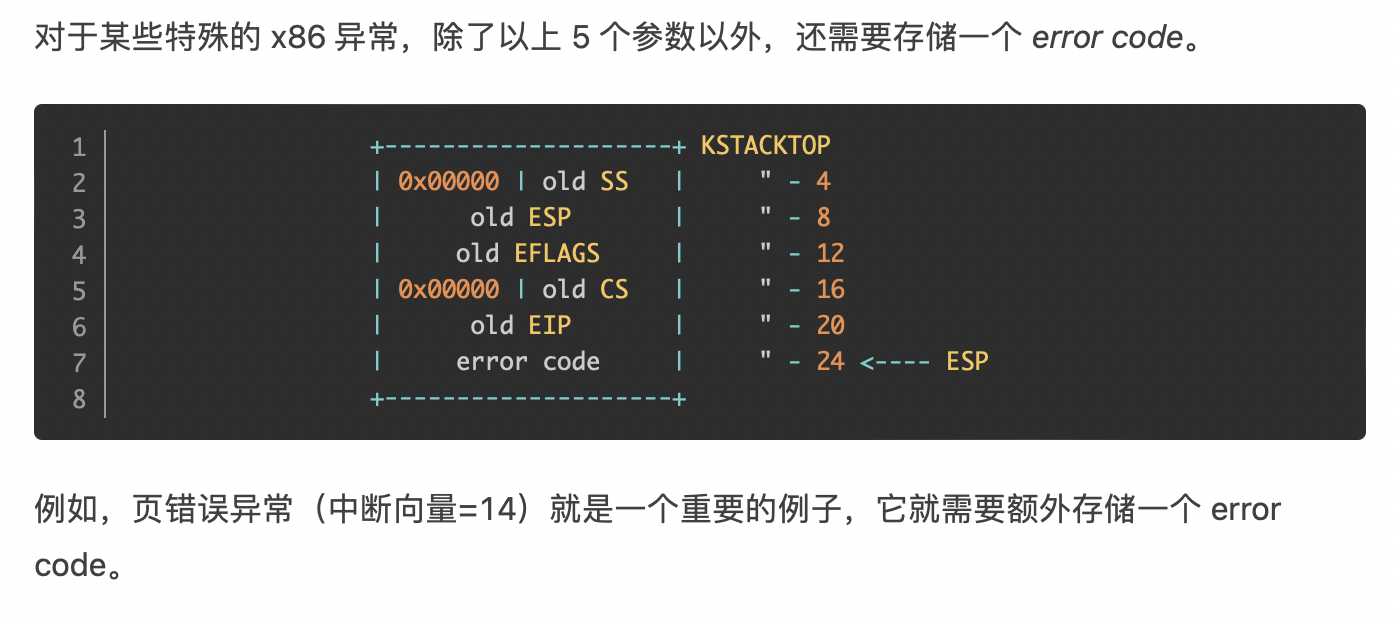
如果处理器已经处于内核态,然后发生了嵌套异常,由于它并不进行栈切换,所以无须存储 SSESP 寄存器状态。对于不包含 error code 的异常,在进入处理函数前内核栈状态如下所示:

image-20220703163920093

对于包含了 error code 的异常,则将 error code 继续 push 到 EIP之后。
警告:如果 CPU 处理嵌套异常的时候,无法将状态 push 到内核栈(由于栈空间不足等原因),则 CPU 无法恢复当前状态,只能重启。当然,这是内核设计中必须避免的。

头文件 inc/trap.hkern/trap.h 包含了与中断和异常相关的定义,需要仔细阅读。其中 kern/trap.h 包含内核私有定义,而 inc/trap.h 包含对内核以及用户进程和库都有用的定义。
每个异常和中断都应该在 trapentry.Strap_init() 有自己的处理函数,并在 IDT 中将这些处理函数的地址初始化。每个处理函数都需要在栈上新建一个 struct Trapframe(见 inc/trap.h),以其地址为参数调用 trap() 函数,然后进行异常处理。

image-20220703165253213

1
2
3
4
5
6
7
8
9
10
11
12
13
14
15
16
17
18
19
20
21
22
23
24
25
26
27
28
29
30
31
32
33
34
35
36
37
38
39
40
41
=> 0xf0103734 <env_pop_tf+15>:  iret   
0xf0103734 486 asm volatile(
(gdb) info registers
eax 0x0 0
ecx 0x0 0
edx 0x0 0
ebx 0x0 0
esp 0xf0224030 0xf0224030
ebp 0x0 0x0
esi 0x0 0
edi 0x0 0
eip 0xf0103734 0xf0103734 <env_pop_tf+15>
eflags 0x96 [ PF AF SF ]
cs 0x8 8
ss 0x10 16
ds 0x23 35
---Type <return> to continue, or q <return> to quit---
es 0x23 35
fs 0x23 35
gs 0x23 35
(gdb) si
=> 0x800020: cmp $0xeebfe000,%esp
0x00800020 in ?? ()
(gdb) info registers
eax 0x0 0
ecx 0x0 0
edx 0x0 0
ebx 0x0 0
esp 0xeebfe000 0xeebfe000
ebp 0x0 0x0
esi 0x0 0
edi 0x0 0
eip 0x800020 0x800020
eflags 0x2 [ ]
cs 0x1b 27
ss 0x23 35
ds 0x23 35
---Type <return> to continue, or q <return> to quit---
es 0x23 35
fs 0x23 35
gs 0x23 35

可以看到=> 0x800020: cmp $0xeebfe000,%esp时,进入了用户态,因为cs的值变为了GD_UT | 0X3 = 0x1b,esp的值为USTACKTOP的值0xeebfe000

image-20220704103409165

Exercise 4.

Exercise 4. Edit trapentry.S and trap.c and implement the features described above. The macros TRAPHANDLER and TRAPHANDLER_NOEC in trapentry.S should help you, as well as the T_* defines in inc/trap.h. You will need to add an entry point in trapentry.S (using those macros) for each trap defined in inc/trap.h, and you’ll have to provide _alltraps which the TRAPHANDLER macros refer to. You will also need to modify trap_init() to initialize the idt to point to each of these entry points defined in trapentry.S; the SETGATE macro will be helpful here.

Your _alltraps should:

  1. push values to make the stack look like a struct Trapframe
  2. load GD_KD into %ds and %es
  3. pushl %esp to pass a pointer to the Trapframe as an argument to trap()
  4. call trap (can trap ever return?)

Consider using the pushal instruction; it fits nicely with the layout of the struct Trapframe.

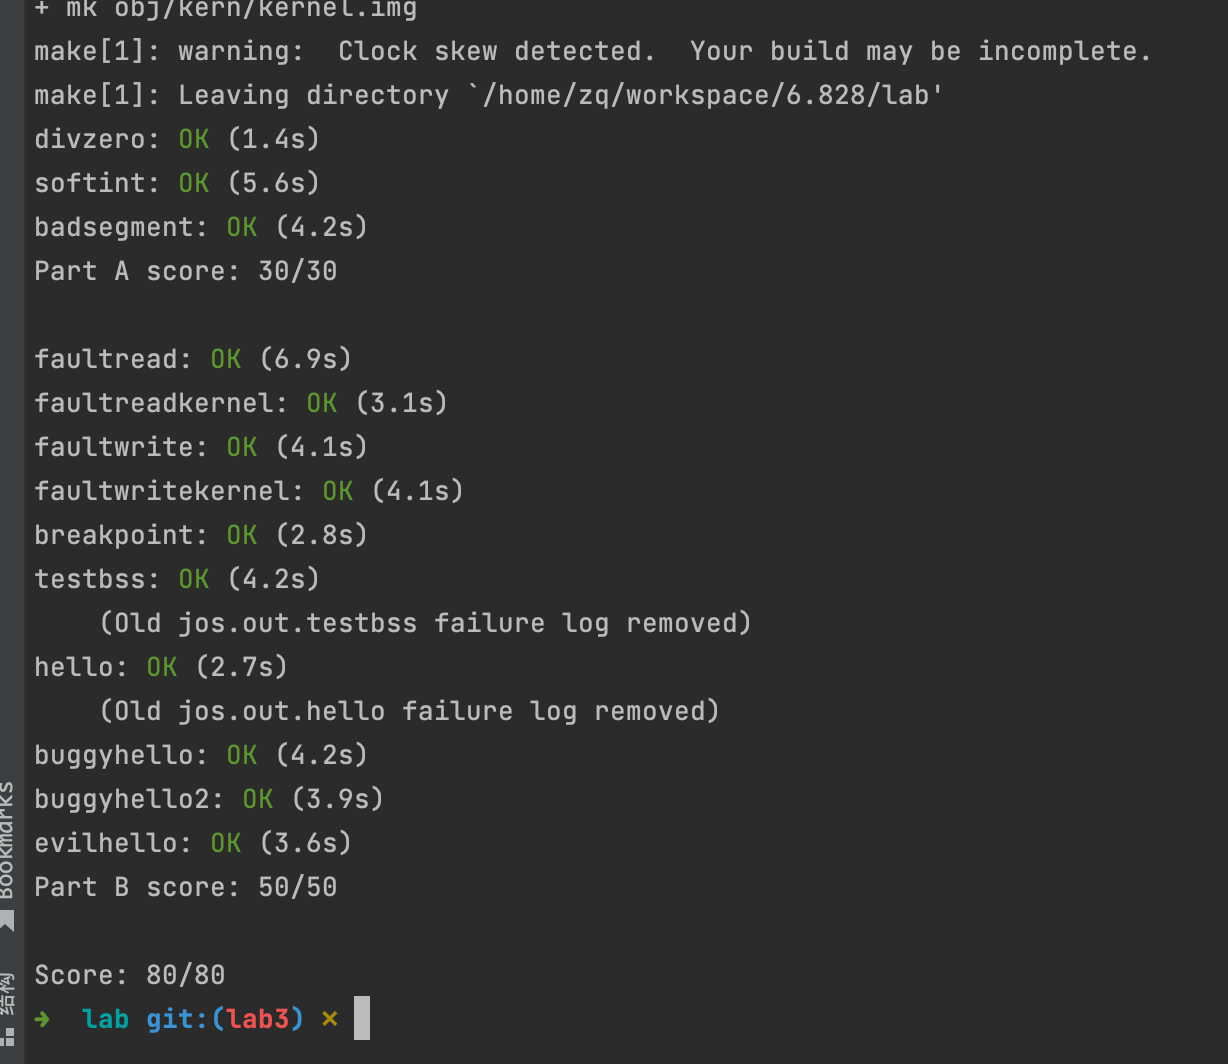
Test your trap handling code using some of the test programs in the user directory that cause exceptions before making any system calls, such as user/divzero. You should be able to get make grade to succeed on the divzero, softint, and badsegment tests at this point.

查看trapentry.s

1
2
3
4
5
6
7
8
9
10
11
12
13
14
15
16
17
/* TRAPHANDLER defines a globally-visible function for handling a trap.
* It pushes a trap number onto the stack, then jumps to _alltraps.
* Use TRAPHANDLER for traps where the CPU automatically pushes an error code.
*
* You shouldn't call a TRAPHANDLER function from C, but you may
* need to _declare_ one in C (for instance, to get a function pointer
* during IDT setup). You can declare the function with
* void NAME();
* where NAME is the argument passed to TRAPHANDLER.
*/
#define TRAPHANDLER(name, num) \
.globl name; /* define global symbol for 'name' */ \
.type name, @function; /* symbol type is function */ \
.align 2; /* align function definition */ \
name: /* function starts here */ \
pushl $(num); \
jmp _alltraps

.global 定义了全局符号。

​ 汇编函数如果需要在其他文件内调用,需要把函数声明为全局,此时就会使用.global这个伪操作。

.type 用来制定一个符号类型是函数类型或者是对象类型,对象类型一般是数据

.type symbol, @object

.type symbol, @function

.align 用来指定内存对齐方式

.align size

​ 表示按size字节对齐内存

这一步做了什么?光看这里很难理解,提示说是构造一个 Trapframe 结构体来保存现场,但是这里怎么直接就 push 中断向量了?实际上,在上文已经指出, cpu 自身会先 push 一部分寄存器(见例子所述),而其他则由用户和操作系统决定。由于中断向量是操作系统定义的,所以从这部分开始就已经不属于 cpu 的工作范畴了。

trapentry.S 中:

根据inc/trap.h 绑定

1
2
3
4
5
6
7
8
9
10
11
12
13
14
15
16
17
18
19
20
21
22
23
24
25
26
27
28
29
30
31
32
33
34
35
36
37
38
39
40
41
42
43
44
45
46
47
48
49
50
51
52
53
54
55
56
57
58
// TRAPHANDLER defines a globally-visible function for handling a trap.
// It pushes a trap number onto the stack, then jumps to _alltraps.

// Use TRAPHANDLER for traps where the CPU automatically pushes an error code.
// Use TRAPHANDLER_NOEC for traps where the CPU doesn't push an error code.

/*
* Lab 3: Your code here for generating entry points for the different traps.
*/
// 绑定异常到自定义处理器
TRAPHANDLER_NOEC(handler0, T_DIVIDE)
TRAPHANDLER_NOEC(handler1, T_DEBUG)
TRAPHANDLER_NOEC(handler2, T_NMI)
TRAPHANDLER_NOEC(handler3, T_BRKPT)
TRAPHANDLER_NOEC(handler4, T_OFLOW)
TRAPHANDLER_NOEC(handler5, T_BOUND)
TRAPHANDLER_NOEC(handler6, T_ILLOP)
TRAPHANDLER_NOEC(handler7, T_DEVICE)
TRAPHANDLER(handler8, T_DBLFLT)
// 9 deprecated since 386
TRAPHANDLER(handler10, T_TSS)
TRAPHANDLER(handler11, T_SEGNP)
TRAPHANDLER(handler12, T_STACK)
TRAPHANDLER(handler13, T_GPFLT)
TRAPHANDLER(handler14, T_PGFLT)
// 15 reserved by intel
TRAPHANDLER_NOEC(handler16, T_FPERR)
TRAPHANDLER(handler17, T_ALIGN)
TRAPHANDLER_NOEC(handler18, T_MCHK)
TRAPHANDLER_NOEC(handler19, T_SIMDERR)
// system call (interrupt)
TRAPHANDLER_NOEC(handler48, T_SYSCALL)

// 该函数是全局的,但是在 C 文件中使用的时候需要使用 void name(); 再声明一下。

/*
* 你不应该从C调用TRAPHANDLER函数,但你可能需要在C中_declare_(例如,在IDT设置期间获得一个函数指针)。您可以使用声明函数
void NAME();
其中NAME是传递给TRAPHANDLER的参数。
*/

/*
* Lab 3: Your code here for _alltraps
*/
_alltraps:
pushl %es
pushl %ds
pushal

movw $GD_KD, %ax
movw %ax, %ds
movw %ax, %es

pushl %esp
call trap


// 不能用立即数直接给段寄存器赋值。因此不能直接写movw $GD_KD, %ds。

SETGATE MACRO

Set up a normal interrupt/trap gate descriptor.

1
2
3
4
5
6
7
8
9
10
11
12
13
14
15
16
17
18
19
20
21
22
23
24
25
26
27
28
29
30
31
32
33
34
35
36
37
38
// Set up a normal interrupt/trap gate descriptor.
// - istrap: 1 for a trap (= exception) gate, 0 for an interrupt gate.
// see section 9.6.1.3 of the i386 reference: "The difference between
// an interrupt gate and a trap gate is in the effect on IF (the
// interrupt-enable flag). An interrupt that vectors through an
// interrupt gate resets IF, thereby preventing other interrupts from
// interfering with the current interrupt handler. A subsequent IRET
// instruction restores IF to the value in the EFLAGS image on the
// stack. An interrupt through a trap gate does not change IF."
// - sel: 代码段选择器 for interrupt/trap handler
// - off: 代码段的偏移量 for interrupt/trap handler
// - dpl: Descriptor Privilege Level -
// the privilege level required for software to invoke
// this interrupt/trap gate explicitly using an int instruction.
/*
gate
这是一个 struct Gatedesc。
istrap
该中断是 trap(exception) 则为1,是 interrupt 则为0。
sel
代码段选择器。进入内核的话是 GD_KT。
off
相对于段的偏移,简单来说就是函数地址。
dpl(Descriptor Privileged Level)
权限描述符。
*/
#define SETGATE(gate, istrap, sel, off, dpl) \
{ \
(gate).gd_off_15_0 = (uint32_t) (off) & 0xffff; \
(gate).gd_sel = (sel); \
(gate).gd_args = 0; \
(gate).gd_rsv1 = 0; \
(gate).gd_type = (istrap) ? STS_TG32 : STS_IG32; \
(gate).gd_s = 0; \
(gate).gd_dpl = (dpl); \
(gate).gd_p = 1; \
(gate).gd_off_31_16 = (uint32_t) (off) >> 16; \
}

Challenge! You probably have a lot of very similar code right now, between the lists of TRAPHANDLER in trapentry.S and their installations in trap.c. Clean this up. Change the macros in trapentry.S to automatically generate a table for trap.c to use. Note that you can switch between laying down code and data in the assembler by using the directives .text and .data.

Questions

Answer the following questions in your answers-lab3.txt:

  1. What is the purpose of having an individual handler function for each exception/interrupt? (i.e., if all exceptions/interrupts were delivered to the same handler, what feature that exists in the current implementation could not be provided?)

    为每个异常/中断提供单独的处理函数的目的是什么?(也就是说,如果所有异常/中断都被交付给同一个处理程序,当前实现中存在的哪些特性不能提供?)

    答:因为每个异常和中断的处理方式不同,例如除0异常不会继续返回程序执行,而I/O操作中断后会继续返回程序处理。一个handler难以处理多种情况。

  2. Did you have to do anything to make the user/softint program behave correctly? The grade script expects it to produce a general protection fault (trap 13), but softint‘s code says int $14. Why should this produce interrupt vector 13? What happens if the kernel actually allows softint‘s int $14instruction to invoke the kernel’s page fault handler (which is interrupt vector 14)?

Part B: Page Faults, Breakpoints Exceptions, and System Calls

Exercise5: Handling Page Faults

缺页错误异常,中断向量 14 (T_PGFLT),是一个非常重要的异常类型,lab3 以及 lab4 都强烈依赖于这个异常处理。当程序遇到缺页异常时,它将引起异常的虚拟地址存入 CR2 控制寄存器( control register)。在 trap.c 中,我们已经提供了page_fault_handler() 函数用来处理缺页异常。

修改trap_dispatch(),将页面故障异常分派到page_fault_handler()。现在,您应该能够在faultread、faultreadkernel、faultwrite和faultwritekernel测试中获得成功。如果其中任何一个不工作,找出原因并解决它们。记住,您可以使用make run-x或make run-x-nox将JOS引导到特定的用户程序中。例如,make run-hello-nox运行hello用户程序。

1
2
3
4
5
6
7
8
9
10
11
12
13
14
15
16
17
18
19
20
static void
trap_dispatch(struct Trapframe *tf)
{
// Handle processor exceptions.
// LAB 3: Your code here.
switch(tf->tf_trapno){
case T_PGFLT:
page_fault_handler();
break;
default:
// Unexpected trap: The user process or the kernel has a bug.
print_trapframe(tf);
if (tf->tf_cs == GD_KT)
panic("unhandled trap in kernel");
else {
env_destroy(curenv); // 销毁
return;
}
}
}

Exercise 6: The Breakpoint Exception

断点异常,中断向量 3 (T_BRKPT) 允许调试器给程序加上断点。原理是暂时把程序中的某个指令替换为一个 1 字节大小的 int3软件中断指令。在 JOS 中,我们将它实现为一个伪系统调用。这样,任何程序(不限于调试器)都能使用断点功能。

Modify trap_dispatch() to make breakpoint exceptions invoke the kernel monitor. You should now be able to get make grade to succeed on the breakpoint test.

1
2
3
4
5
6
7
8
9
10
11
12
13
14
15
16
17
18
19
20
21
22
23
static void
trap_dispatch(struct Trapframe *tf) // dispatch 调度
{
// Handle processor exceptions.
// LAB 3: Your code here.
switch(tf->tf_trapno){
case T_PGFLT:
page_fault_handler(tf);
break;
case T_BRKPT:
monitor(tf);
break;
default:
// Unexpected trap: The user process or the kernel has a bug.
print_trapframe(tf);
if (tf->tf_cs == GD_KT)
panic("unhandled trap in kernel");
else {
env_destroy(curenv); // 销毁
return;
}
}
}

Challenge! Modify the JOS kernel monitor so that you can ‘continue’ execution from the current location (e.g., after the int3, if the kernel monitor was invoked via the breakpoint exception), and so that you can single-step one instruction at a time. You will need to understand certain bits of the EFLAGS register in order to implement single-stepping.

Optional: If you’re feeling really adventurous, find some x86 disassembler source code - e.g., by ripping it out of QEMU, or out of GNU binutils, or just write it yourself - and extend the JOS kernel monitor to be able to disassemble and display instructions as you are stepping through them. Combined with the symbol table loading from lab 1, this is the stuff of which real kernel debuggers are made.

Questions

  1. The break point test case will either generate a break point exception or a general protection fault depending on how you initialized the break point entry in the IDT (i.e., your call to SETGATE from trap_init). Why? How do you need to set it up in order to get the breakpoint exception to work as specified above and what incorrect setup would cause it to trigger a general protection fault?

    断点测试用例将生成断点异常或一般保护故障,这取决于您在IDT中初始化断点条目的方式(即,从trap_init调用SETGATE)。为什么?您需要如何设置它才能使断点异常像上面指定的那样工作?哪些不正确的设置会导致它触发一般的保护故障?

    答:权限问题。特权级别是个很重要的点。每个IDT的entries内的中断描述符都为中断处理程序设定了一个DPL(Descriptor Privilege Level)。用户程序的特权级别是3,内核的特权级别是0(可知0级别更高)。如果用户产生的中断/异常需要级别0,那么用户就无权请内核调用这个处理程序,就会产生一个general protection fault,如果是内核发生中断/异常的话,特权级别总是够的

    SETGATE(idt[T_BRKPT], 1, GD_KT, brkpt_handler, 3);中如果最后一个参数dpl设为3就会产生一个breakpoint exception,如果设为0就会产生一个general protection fault。这也是由于特权级别影响的。breakpoint test程序的特权级别是3,如果断点异常处理程序特权设为3那就可以是断点异常,如果设为0就产生保护错误。

  2. What do you think is the point of these mechanisms, particularly in light of what the user/softint test program does?

    里面是这条代码asm volatile("int $14");本来想中断调用页面错误处理,结果因为特权级别不够而产生一个保护异常,所以重点应该是要分清特权级别吧。要区分$14$0x30

    优先级别低的代码无法访问优先级高的代码,优先级高低由gd_dpl判断。数字越小越高。

Exercise 7: System calls

用户进程通过调用系统调用请求内核为它们做一些事情。当用户进程调用一个系统调用时,处理器进入内核模式,处理器和内核合作保存用户进程的状态,内核执行相应的代码来执行系统调用,然后恢复用户进程。用户进程如何获得内核的注意,以及用户进程如何指定要执行的调用,这些具体细节在不同的系统中有所不同。

在JOS内核中,我们将使用int指令,它会导致处理器中断。特别地,我们将使用int $0x30作为系统调用中断。我们已经为您定义了常量T_SYSCALL到48 (0x30)。您必须设置中断描述符,以允许用户进程引起中断。注意,中断0x30不能由硬件生成,所以不会因为允许用户代码生成它而产生歧义。

应用程序将在寄存器中传递系统调用号和系统调用参数。这样,内核就不需要在用户环境的堆栈或指令流中到处寻找了。系统调用号将进入%eax,参数(最多5个)将分别进入%edx、%ecx、%ebx、%edi和%esi。内核将返回值返回到%eax中。调用系统调用的汇编代码已经为您编写,在lib/syscall.c中的syscall()中。你应该通读一遍,确保你明白发生了什么.

exercise: 在内核中为中断向量T_SYSCALL添加一个处理程序。你必须编辑kern/trapentry。S和kern/trap.c的trap_init()。您还需要更改trap_dispatch()来处理系统调用中断,方法是使用适当的参数调用sycall(在kern/syscall.c中定义),然后将返回值传递回%eax中的用户进程。最后,你需要在kern/syscall.c中实现syscall()。确保如果系统调用号无效,syscall()返回-E_INVAL。您应该阅读并理解lib/syscall.c(特别是内联汇编例程),以确认您对系统调用接口的理解。通过为每个调用调用相应的内核函数来处理inc/syscall.h中列出的所有系统调用。

Run the user/hello program under your kernel (make run-hello). It should print “hello, world” on the console and then cause a page fault in user mode. If this does not happen, it probably means your system call handler isn’t quite right. You should also now be able to get make grade to succeed on the testbss test.

inc/syscall.h

定义了系统调用号

1
2
3
4
5
6
7
8
9
10
11
12
13
#ifndef JOS_INC_SYSCALL_H
#define JOS_INC_SYSCALL_H

/* system call numbers */
enum {
SYS_cputs = 0,
SYS_cgetc,
SYS_getenvid,
SYS_env_destroy,
NSYSCALLS
};

#endif /* !JOS_INC_SYSCALL_H */

lib/syscall.c

这是系统调用的通用模板,不同的系统调用都会以不同参数调用syscall函数。

1
2
3
4
5
6
7
8
9
10
11
12
13
14
15
16
17
18
19
20
21
22
23
24
25
26
27
28
29
30
31
32
33
34
35
36
37
38
39
40
41
42
43
44
45
46
47
48
49
50
51
52
53
54
55
// System call stubs.

#include <inc/syscall.h>
#include <inc/lib.h>

static inline int32_t
syscall(int num, int check, uint32_t a1, uint32_t a2, uint32_t a3, uint32_t a4, uint32_t a5)
{
int32_t ret;

// Generic system call: 在AX中传递系统呼叫号,在DX、CX、BX、DI、SI中最多传递5个参数。
// 使用t_sycall中断内核。
// “volatile”告诉汇编器不要因为没有使用返回值而对该指令进行优化。
// 最后一个子句告诉汇编器,这可能会改变条件代码和任意内存位置。
// 可以看到,该段汇编的output为 ret
asm volatile("int %1\n"
: "=a" (ret)
: "i" (T_SYSCALL),
"a" (num),
"d" (a1),
"c" (a2),
"b" (a3),
"D" (a4),
"S" (a5)
: "cc", "memory");

if(check && ret > 0)
panic("syscall %d returned %d (> 0)", num, ret);
// 函数的返回为ret
return ret;
}

void
sys_cputs(const char *s, size_t len)
{
syscall(SYS_cputs, 0, (uint32_t)s, len, 0, 0, 0);
}

int
sys_cgetc(void)
{
return syscall(SYS_cgetc, 0, 0, 0, 0, 0, 0);
}

int
sys_env_destroy(envid_t envid)
{
return syscall(SYS_env_destroy, 1, envid, 0, 0, 0, 0);
}

envid_t
sys_getenvid(void)
{
return syscall(SYS_getenvid, 0, 0, 0, 0, 0, 0);
}

补充知识:GCC内联汇编
其语法固定为:
asm volatile (“asm code”:output:input:changed);

1
2
3
4
5
6
7
8
9
10
asm volatile("int %1\n"
: "=a" (ret)
: "i" (T_SYSCALL),
"a" (num),
"d" (a1),
"c" (a2),
"b" (a3),
"D" (a4),
"S" (a5)
: "cc", "memory");
限定符 意义
“m”、”v”、”o” 内存单元
“r” 任何寄存器
“q” 寄存器eax、ebx、ecx、edx之一
“i”、”h” 直接操作数
“E”、”F” 浮点数
“g” 任意
“a”、”b”、”c”、”d” 分别表示寄存器eax、ebx、ecx和edx
“S”、”D” 寄存器esi、edi
“I” 常数 (0至31)

除了这些约束之外, 输出值还包含一个约束修饰符:

输出修饰符 描述
+ 可以读取和写入操作数
= 只能写入操作数
% 如果有必要操作数可以和下一个操作数切换
& 在内联函数完成之前, 可以删除和重新使用操作数

根据表格内容,可以看出该内联汇编作用就是引发一个int中断,中断向量为立即数 T_SYSCALL,同时,对寄存器进行操作。看懂这,就清楚了,这一部分应该不需要我们改动,因为我们处理的是中断已经产生后的部分。当然,还有另一种更简单的思路,inc/ 目录下的,其实都是操作系统留给用户的接口,所以才会在里面看到 stdio.hassert.h 等文件。那么,要进行系统调用肯定也是先调用 inc/ 中的那个,具体处理应该是在 kern/ 中实现。

ref:https://www.jianshu.com/p/f67034d0c3f2

kern/trap.c

trap_init()添加

image-20220704144047847

权限更改为3,以便用户进程可以触发该中断

修改trap_dispatch()

1
2
3
4
5
6
7
8
case T_SYSCALL:
tf-tf_regs.reg_eax = syscall(tf->tf_regs.reg_eax,
tf->tf_regs.reg_edx,
tf->tf_regs.reg_ecx,
tf->tf_regs.reg_ebx,
tf->tf_regs.reg_edi,
tf->tf_regs.reg_esi);
break;

kern/syscall.c

我们在 kern/trap.c 中调用的实际上就是这里的 syscall 函数,而不是 lib/syscall.c 中的那个。想明白这一点,设置参数也就很简单了,注意返回值的处理。
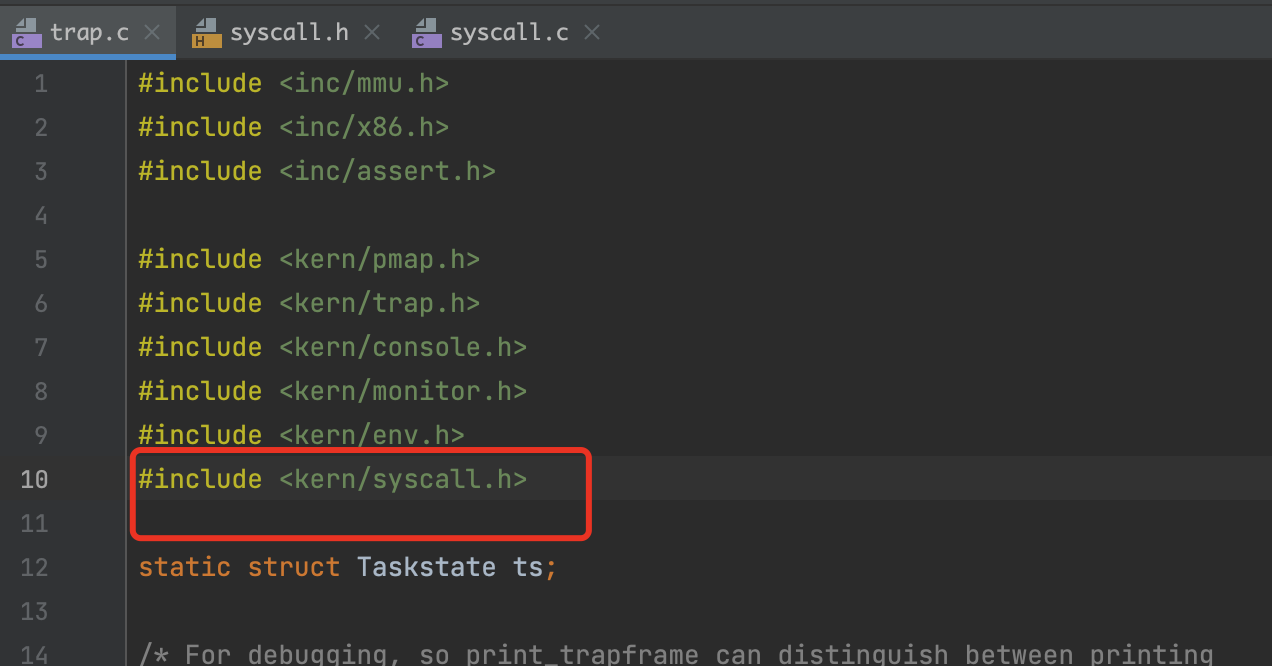
image-20220704154830887
1
2
3
4
5
6
7
8
9
10
11
12
13
14
15
16
17
18
19
20
21
22
23
24
25
26
27
28
// Dispatches to the correct kernel function, passing the arguments.
int32_t
syscall(uint32_t syscallno, uint32_t a1, uint32_t a2, uint32_t a3, uint32_t a4, uint32_t a5)
{
// Call the function corresponding to the 'syscallno' parameter.
// Return any appropriate return value.
// LAB 3: Your code here.

//panic("syscall not implemented");
int32_t retVal = 0;
switch (syscallno) {
case SYS_cputs:
sys_cputs((const char *)a1, a2);
break;
case SYS_cgetc:
retVal = sys_cgetc();
break;
case SYS_getenvid:
retVal = sys_getenvid()>=0; // // Returns the current environment's envid.
break;
case SYS_env_destroy:
retVal = sys_env_destroy(a1); // env_id
break;
default:
return -E_INVAL;
}
return retVal;
}

运行 make grade 可以通过 testbss,运行 make run-hello 可以打印出 hello world,紧接着提示了页错误。

image-20220704163653390 image-20220704163812230 image-20220704163804732

通过 exercise 7,可以看出 JOS系 统调用的步骤为:

  1. 用户进程使用 inc/ 目录下暴露的接口
  2. lib/syscall.c 中的函数将系统调用号及必要参数传给寄存器,并引起一次 int $0x30 中断
  3. kern/trap.c 捕捉到这个中断,并将 TrapFrame 记录的寄存器状态作为参数,调用处理中断的函数
  4. kern/syscall.c 处理中断

Exercise 8: User-mode startup

一个用户程序开始运行在lib/entry.S的顶部。在一些设置之后,这段代码调用lib/libmain.c中libmain()。你应该修改libmain()来初始化全局指针thisenv,使其指向envs[]数组中的环境结构体Env。(Note that lib/entry.S has already defined envs to point at the UENVS mapping you set up in Part A.)

Hint: look in inc/env.h and use sys_getenvid.

libmain() then calls umain, which, in the case of the hello program, is in user/hello.c. Note that after printing “hello, world”, it tries to access thisenv->env_id. This is why it faulted earlier.

Now that you’ve initialized thisenv properly, it should not fault. If it still faults, you probably haven’t mapped the UENVS area user-readable (back in Part A in pmap.c; this is the first time we’ve actually used the UENVS area).

Add the required code to the user library, then boot your kernel. You should see user/hello print “hello, world“ and then print “i am environment 00001000“. user/hello then attempts to “exit” by calling sys_env_destroy() (see lib/libmain.c and lib/exit.c). Since the kernel currently only supports one user environment, it should report that it has destroyed the only environment and then drop into the kernel monitor. You should be able to get make grade to succeed on the hello test.

umain.c

user/hello.c

1
2
3
4
5
6
void
umain(int argc, char **argv)
{
cprintf("hello, world\n");
cprintf("i am environment %08x\n", thisenv->env_id);
}
1
2
3
4
5
6
7
8
9
10
11
12
13
14
15
16
17
void
libmain(int argc, char **argv)
{
// set thisenv to point at our Env structure in envs[].
// LAB 3: Your code here.
thisenv = &envs[ENVX(sys_getenvid())]; // &envs[ENVX(envid)]

// save the name of the program so that panic() can use it
if (argc > 0)
binaryname = argv[0];

// call user main routine
umain(argc, argv);

// exit gracefully
exit();
}

image-20220704172003993

hello 完成

Exercise 9: Page faults and memory protection

内存保护是操作系统的关键功能,它确保了一个程序中的错误不会导致其他程序或是操作系统自身的崩溃。
操作系统通常依赖硬件的支持来实现内存保护。操作系统会告诉硬件哪些虚拟地址可用哪些不可用。当某个程序想访问不可用的内存地址或不具备权限时,处理器将在出错指令处停止程序,然后陷入内核。如果错误可以处理,内核就处理并恢复程序运行,否则无法恢复。
作为可以修复的错误,设想某个自动生长的栈。在许多系统中内核首先分配一个页面给栈,如果某个程序访问了页面外的空间,内核会自动分配更多页面以让程序继续。这样,内核只用分配程序需要的栈内存给它,然而程序感觉仿佛可以拥有任意大的栈内存。
系统调用也为内存保护带来了有趣的问题。许多系统调用接口允许用户传递指针给内核,这些指针指向待读写的用户缓冲区。内核处理系统调用的时候会对这些指针解引用。这样就带来了两个问题:

  1. 内核的页错误通常比用户进程的页错误严重得多,如果内核在操作自己的数据结构时发生页错误,这就是一个内核bug,会引起系统崩溃。因此,内核需要记住这个错误是来自用户进程。
  2. 内核比用户进程拥有更高的内存权限,用户进程给内核传递的指针可能指向一个只有内核能够读写的区域,内核必须谨慎避免解引用这类指针,因为这样可能导致内核的私有信息泄露或破坏内核完整性。

我们将对用户进程传给内核的指针做一个检查来解决这两个问题。内核将检查指针指向的是内存中用户空间部分,页表也允许内存操作。

Change kern/trap.c to panic if a page fault happens in kernel mode.

Hint: to determine whether a fault happened in user mode or in kernel mode, check the low bits of the tf_cs. (tf_cs是0x18还是0x1b, 0x18|0x03 = 0x1b此时是用户模式,0x18是内核模式,检查&3后的低2位)

Read user_mem_assert in kern/pmap.c and implement user_mem_check in that same file.

Change kern/syscall.c to sanity check arguments to system calls.

Boot your kernel, running user/buggyhello. The environment should be destroyed, and the kernel should not panic. You should see:

1
2
3
4
[00001000] user_mem_check assertion failure for va 00000001
[00001000] free env 00001000
Destroyed the only environment - nothing more to do!

Finally, change debuginfo_eip in kern/kdebug.c to call user_mem_check on usd, stabs, and stabstr. If you now run user/breakpoint, you should be able to run backtrace from the kernel monitor and see the backtrace traverse into lib/libmain.c before the kernel panics with a page fault. What causes this page fault? You don’t need to fix it, but you should understand why it happens.

kern/trap.c

1
2
3
4
5
6
7
8
9
10
11
12
13
14
15
16
17
18
19
20
21
22
void
page_fault_handler(struct Trapframe *tf)
{
uint32_t fault_va;

// Read processor's CR2 register to find the faulting address
fault_va = rcr2();

// Handle kernel-mode page faults.
// LAB 3: Your code here.
if(!(tf->tf_cs & 3)){
panic("page fault in kernel mode.");
}
// We've already handled kernel-mode exceptions, so if we get here,
// the page fault happened in user mode.

// Destroy the environment that caused the fault.
cprintf("[%08x] user fault va %08x ip %08x\n",
curenv->env_id, fault_va, tf->tf_eip);
print_trapframe(tf);
env_destroy(curenv);
}

kern/pmap.c

user_mem_check

1
2
3
4
5
6
7
8
9
10
11
12
13
14
15
16
17
18
19
20
21
22
23
24
25
26
27
28
29
30
31
32
33
34
35
36
// 检查一个环境是否允许访问权限为'perm | PTE_P'的内存范围[va, va+len]。
// 通常'perm'至少包含PTE_U,但这不是必需的。'va'和'len'不需要按页面对齐;必须测试包含任何该范围的每个页面。
// 你可以测试'len/PGSIZE', 'len/PGSIZE + 1',或者'len/PGSIZE + 2'页面。
// 用户程序可以访问一个虚拟地址,如果
// (1)该地址在ULIM之下
// (2)页表给了它权限。这些正是您应该在这里实现的测试。
// 这些正是您应该在这里实现的测试。
// 如果有错误,设置'user_mem_check_addr'变量为第一个错误的虚拟地址。
// 如果用户程序可以访问这个地址范围,返回0,否则返回-E_FAULT。
int
user_mem_check(struct Env *env, const void *va, size_t len, int perm)
{
// LAB 3: Your code here.
// 内存范围[va, va+len]
uintptr_t start_va = ROUNDDOWN((uintptr_t)va, PGSIZE);
uintptr_t end_va = ROUNDUP((uintptr_t)va + len, PGSIZE);
// 访问内存,通过页表,那么直接看page table entry
// 遍历查看是否有权限
// pgdir_walk returns a pointer to the page table entry (PTE) for linear address 'va'.
// pte_t *pgdir_walk(pde_t *pgdir, const void *va, int create)
for((uintptr_t)cur_va = start_va;cur_va<end_va;cur_va+=PGSIZE){
// env->env_pgdir 取进程对应的页表
pte_t* cur_pte = pgdir_walk(env->env_pgdir, (void*)cur_va, 0); // 只查询不建立
if(cur_pte == NULL || (*cur_pte & (perm | PTE_P))!=(perm | PTE_P) || cur_va>=ULIM){ // 不满足要求
if(cur_va == start_va){ // 因为va做了近似,所以第一个页面地址要做处理
user_mem_check_addr = va;
}else{
user_mem_check_addr = cur_va;
}
// 程序不能访问这个地址,返回-E_FAULT
return -E_FAULT;
}
}
// 可以访问
return 0;
}
image-20220704223729337

不能写为cur_va<=end_va。会内存越界

user_mem_assert

1
2
3
4
5
6
7
8
9
10
11
12
13
14
15
16
//
// Checks that environment 'env' is allowed to access the range
// of memory [va, va+len) with permissions 'perm | PTE_U | PTE_P'.
// If it can, then the function simply returns.
// If it cannot, 'env' is destroyed and, if env is the current
// environment, this function will not return.
//
void
user_mem_assert(struct Env *env, const void *va, size_t len, int perm)
{
if (user_mem_check(env, va, len, perm | PTE_U) < 0) {
cprintf("[%08x] user_mem_check assertion failure for "
"va %08x\n", env->env_id, user_mem_check_addr);
env_destroy(env); // may not return
}
}

调用了user_mem_check(),不满足则摧毁页面

运行 make run-buggyhello-nox
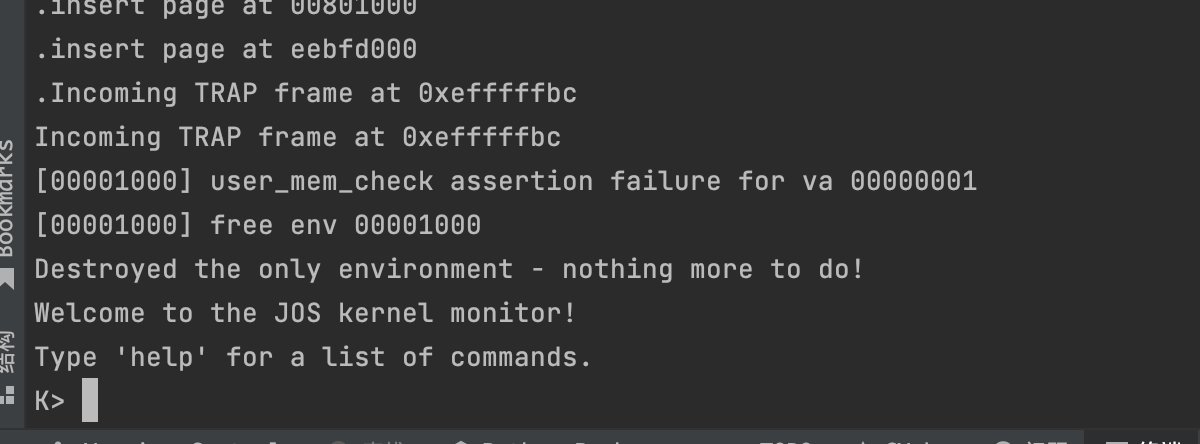
image-20220704213103991

[00001000] user_mem_check assertion failure for va 00000001
[00001000] free env 00001000
Destroyed the only environment - nothing more to do!

最后,change debuginfo_eip in kern/kdebug.c to call user_mem_check on usd, stabs, and stabstr.

1
2
3
4
5
6
7
8
9
10
11
12
13
14
15
16
17
18
19
20
// LAB 3: Your code here.
// 就是查看能否访问 UserStabData
// int user_mem_check(struct Env *env, const void *va, size_t len, int perm)
if(user_mem_check(curenv, (void*) usd, sizeof(struct UserStabData), PTE_U) < 0){
return -1;
}

stabs = usd->stabs;
stab_end = usd->stab_end;
stabstr = usd->stabstr;
stabstr_end = usd->stabstr_end;

// Make sure the STABS and string table memory is valid.
// LAB 3: Your code here.
if(user_mem_check(curenv, (void*) stabs, stab_end - stabs, PTE_U) < 0){
return -1;
}
if(user_mem_check(curenv, (void*) stabstr, stabstr_end - stabstr, PTE_U) < 0){
return -1;
}

make run-breakpoint-nox 然后 使用 backtrace

1
2
3
4
5
6
7
8
9
10
11
12
13
14
15
K> backtrace
Stack backtrace:
ebp efffff10 eip f0100a39 args 00000001 efffff28 f0226000 00000000 f01e4a40
kern/monitor.c:222: monitor+260
ebp efffff80 eip f0103f80 args f0226000 efffffbc 00000000 00000000 00000000
kern/trap.c:200: trap+187
ebp efffffb0 eip f010409d args efffffbc 00000000 00000000 eebfdfd0 efffffdc
kern/trapentry.S:93: <unknown>+0
ebp eebfdfd0 eip 0080007b args 00000000 00000000 00000000 00000000 00000000
lib/libmain.c:26: libmain+63
Incoming TRAP frame at 0xeffffe8c
kernel panic at kern/trap.c:272: page fault in kernel mode.
Welcome to the JOS kernel monitor!
Type 'help' for a list of commands.

可以看到遍历到了:lib/libmain.c:26: libmain+63

ebp(基址指针寄存器)寄存器的内容,efffff10,efffff80,efffffb0都位于内核栈,eebfdfd0位于用户栈。

输入make run-breakpoint-nox-gdb make gdb

把断点打在 monitor()函数处(kern/monitor.c)

image-20220704220321417

查看ebp的内容

1
2
调用者ebp   返回地址eip  参数1  参数2
参数3 参数4 参数5 ...

在查看0xeebfdfd0到用户栈栈顶0xeebfdff0的内容

image-20220704221209942

试图越界访问,可得到

image-20220704221230450

可以看到,最后就只剩了12个字符

这一次,backtrace的打印内容为

ebp eebfdfd0 eip 0080007b args 00000000 00000000 00000000 00000000 00000000

那么下一次为

ebp eebfdff0 eip 00800031 args 00000000 00000000 之后的三个参数全部超过内存访问界限了

现在修改backtrace的函数,输出两个args,backtrace位于kern/monitor.c

image-20220704221854670

image-20220704223813288